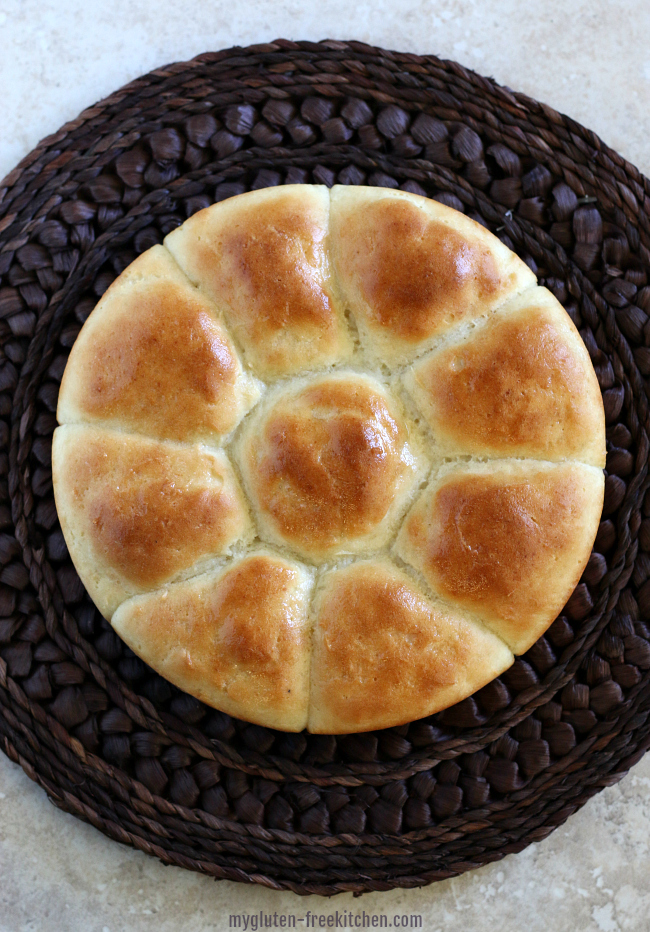
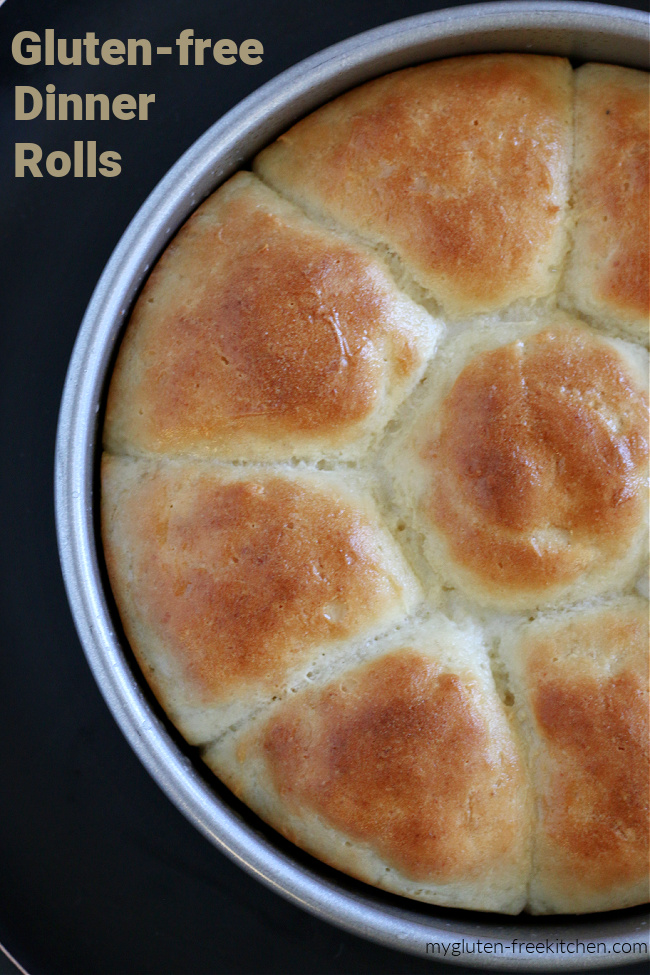
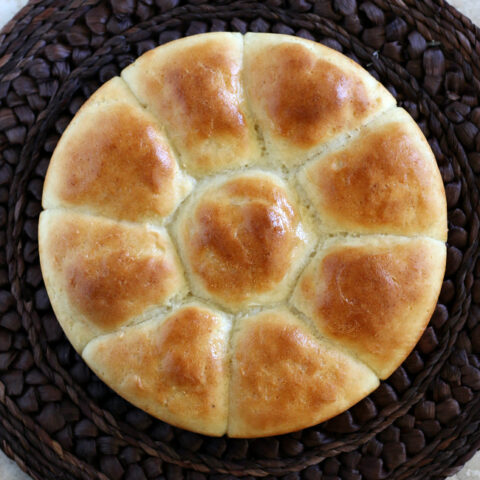
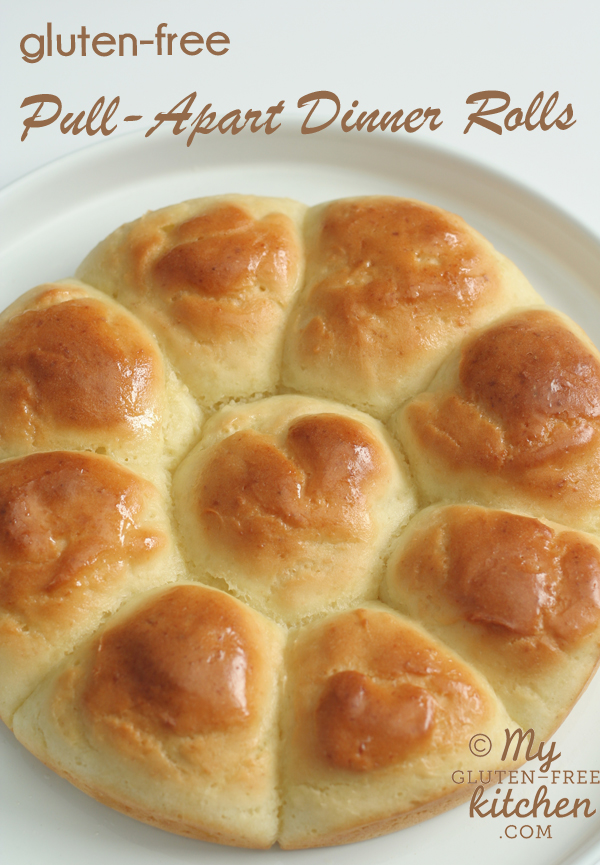
Gluten-free Dinner Rolls that taste like grandma’s holiday rolls! We enjoy these gluten-free rolls at the holidays and year-round! Be sure to read through the post for my tips! I think you’ll be adding these gluten-free buns to your go-to list of gluten-free bread recipes!
After I had to give up gluten, I tried making my own dinner rolls at home, using my old favorite recipes, just substituting gluten-free flour, and each time they failed miserably.
Thankfully, just a few months after my celiac diagnosis and transition to cooking & eating gluten-free, my local gluten-free store brought in Rachel (former owner of Gluten Free Mama) for a baking class. I sat there amazed as she whipped up super easy gluten-free dinner rolls, then when I got to sample them, I couldn’t believe it.
They actually tasted like real homemade dinner rolls! These don’t taste like cardboard, crumble like sawdust, require a knife to saw through, or need to be toasted to be palatable. What a relief, right?! I knew I had to make these!
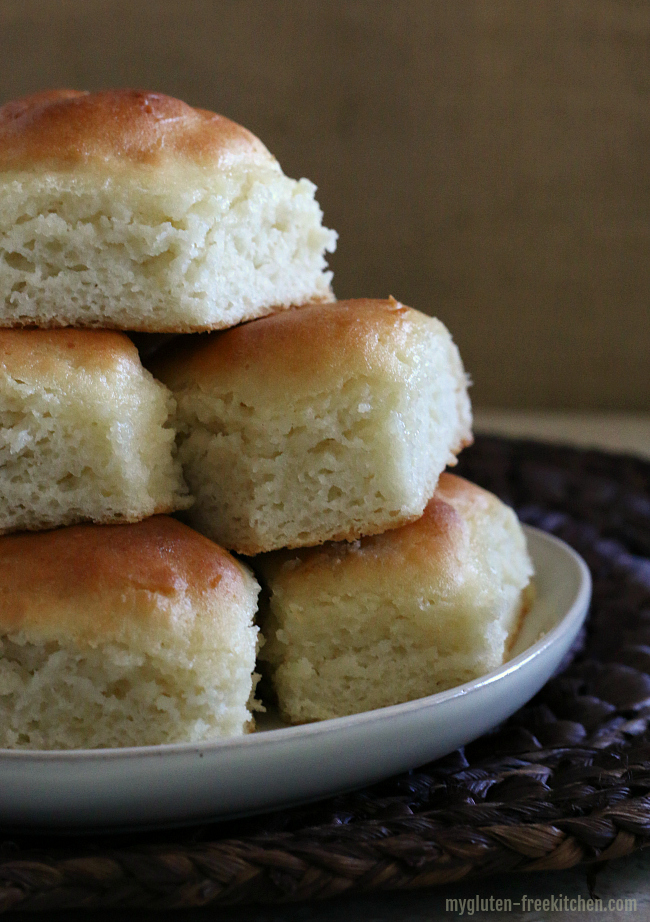
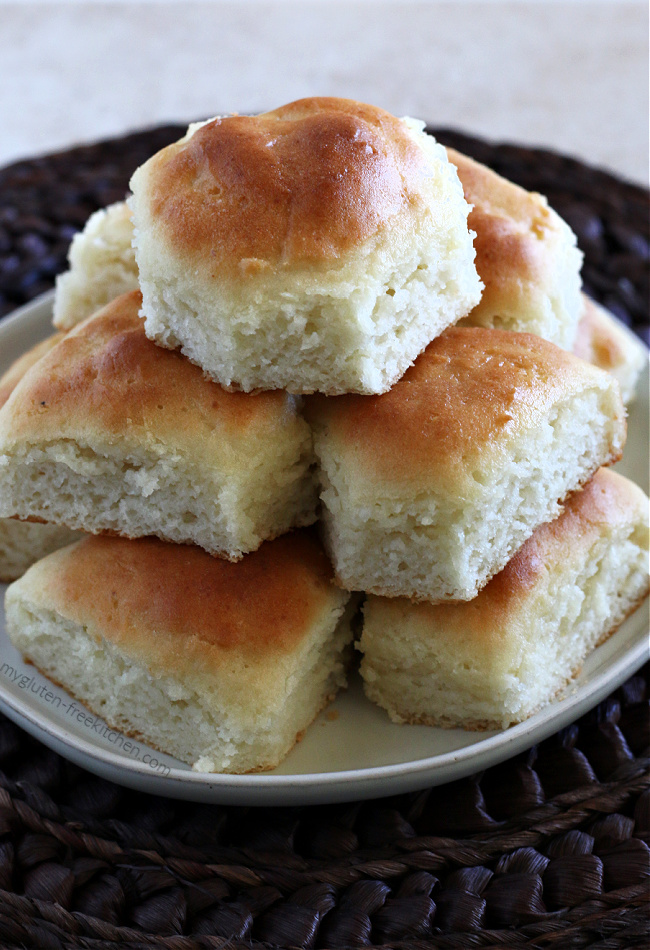
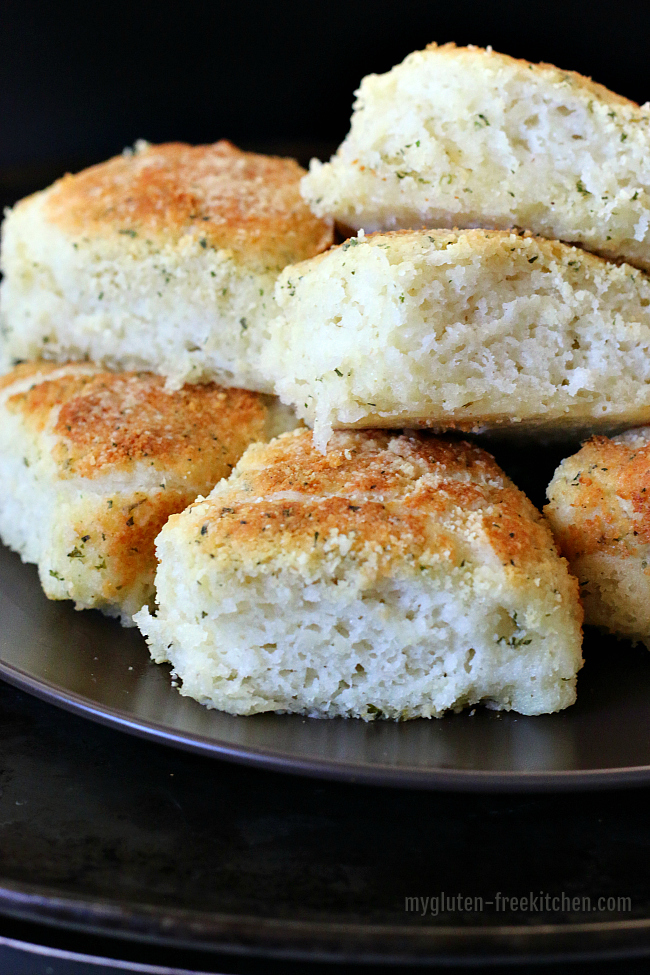
Look at that texture:
After learning how to make these from Rachel, and buying her fabulous cookbook, In the Kitchen with Gluten Free Mama (now out of print, but sometimes used copies show up on Amazon here), I started making these at home regularly. These really are my family’s favorite gluten-free dinner rolls, and you will find them on our table at every holiday meal and at least once a month at dinner throughout the year.
While Rachel’s original recipe is no longer available online; you’ll find my adapted gluten-free roll recipe below, used with her permission.
I’ve cut the amount of time that the gluten-free rolls need to rise by about half by using instant yeast.The instant yeast I use is SAF Instant Yeast. You can buy Saf Instant Yeast from Amazon and you might even find it at your local store. I love using this product to cut the rising time down in some of my yeast bread recipes. When using instant yeast, you do not proof the yeast in water. You add the instant yeast with your dry ingredients, and the water with the liquid ingredients. My directions in the recipe card below reflect this change.
If you haven’t worked with gluten-free yeast dough much yet, it is important to note that it is very different from regular yeast doughs. When making gluten-free yeast dough, the end result is typically a very wet, sticky dough. Do not be tempted to add extra flour! You will not be kneading the dough by hand at all. Your mixer does all the work mixing the dough well.
Once it is done mixing, then you use a large cookie scoop (about 2″ diameter) to scoop the dough in mounds in your baking pan. I recommend using a #16 scoop or a #20 scoop.
Another important thing to note is that your pans will actually help you shape your gluten-free dough. For example. if you were making regular dinner rolls, you could get by having the balls of dough spread out on a big baking sheet almost like cookies. If you did that with gluten-free dough, you would end up with very flat breads.
So here in this recipe, I definitely recommend you grab yourself a metal 9″ round cake or metal pie pan to bake your rolls in. I’ll talk more about your pans helping shape your dough when I share my french bread and hamburger bun recipes.
Here’s a pic that shows how the gluten-free rolls look at the different stages:
While some might like to brush their unbaked rolls with an egg wash, I prefer leaving them plain for baking, then after baking I brush on melted butter. Mmmm!
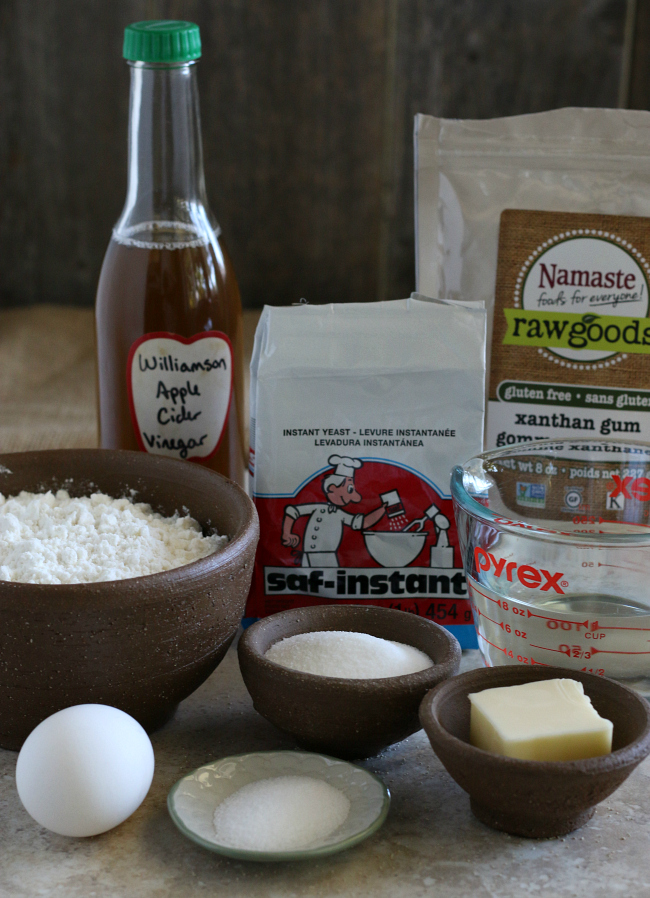
Here’s a look at the ingredients I use every time I make these gluten-free rolls:
Notes on Ingredients and Substitutions for these gluten-free dinner rolls:
While I recommend you use SAF Instant Yeast to cut the rising time, yes, you can use regular, active dry yeast in this recipe. Use the same amount of yeast called for, but go ahead and proof the yeast in the warm water with a bit of sugar. Then you are going to need to extend the rising time for the rolls by at least double what I have listed here.
I do not recommend using any flour blend with coconut flour in it! I tried this recipe with Gluten Free Mama’s Coconut Flour Blend as well, but alas I didn’t have good results. I wouldn’t recommend using any flour blend with coconut flour in it for this recipe. The problem is that coconut flour really absorbs the liquids in a recipe, and mine turned out like hockey pucks.
Yes, you can make this egg-free if you need to. I have tried GFM’s egg free option and it worked well & tasted great! Gluten Free Mama recommends this egg free option: ¼ cup water + 1 Tbsp. ground flaxseed. Simmer water and flaxseed over medium low heat for about 5 minutes until thickened. Stir frequently. Allow to cool. This is equal to one egg.
Yes, you can make this dairy-free if you need to. Substitute the 2 Tablespoons of butter for a good dairy-free margarine or Spectrum organic shortening, melted. You can also either not brush the finished rolls, or brush with a good tasting dairy-free margarine.
If you need to make other substitutions to make this recipe suitable for your diet, feel free to try them. I always recommend making only one new change at a time so that if things go wrong you can isolate the problem and refine from there. If you do make successful substitutions of any kind, please do come back and let us all know!
Which gluten-free flour blend should you use in these rolls?
I’ve tested many flour blends and the three that work best for these gluten-free rolls consistently are:
Gluten-free Mama’s Almond flour blend – used in the recipe as written. This one is harder to find lately under the new ownership (no longer in any of my local stores), and even Amazon keeps running out of it. When it is available on Amazon, you’ll find it here. This is not the same as almond flour. This is a gluten-free flour blend that includes some almond flour, which helps the rolls have a great texture.
Authentic Foods Multi-Blend Flour – It has xanthan gum already in it, but I recommend adding an additional 1/2 tsp. xanthan to the recipe. This is the flour blend that I’ve been using recently for these rolls and it works very well! I don’t notice any difference in results, and would highly recommend. I haven’t had any problems finding it in stock from Amazon here.
There are so many gluten-free flour blends out there, that I simply cannot test them all. I can’t say whether your homemade blend or your favorite store blend will work in this recipe. Using any other gluten-free flour blend means you are bringing in a different combination of flours & starches, and I can’t guarantee that will work well.
That said, please feel free to play with this and see if it works well with your favorite blend. I would recommend you be sure to measure your flour by weight, and be sure to use the same weight I have listed in the recipe.
Read through the reader comments below to see what flour blends have worked well for other readers! Also, if you are using a blend that already contains xanthan gum, try adding an additional 1/2 tsp when making this. Note that some people have had great success using their favorite flour blend, and just removing 1/2 cup of the flour and replacing it with 1/2 cup of real almond flour. This makes it similar to the original Gluten Free Mama’s almond flour blend that I use.
**UPDATE 4/2015. I tested these with Pamela’s artisan flour blend and they turned out okay. Not as fluffy as with GFM, but they worked. Cup4Cup also worked okay – again, not quite as good, but an okay choice for sure! Also tested with MANINIS Gluten Free Multi-Purpose Flour Mix and boy oh boy did that dough rise! Super big, then collapsed after baking! But they tasted great and had great texture, so I would recommend that one too.
Update: 11/2018: My friend Chrystal uses Bob’s Red Mill Gluten-free 1-to-1 Baking Flour and says it works well in these. She says to be sure to measure by weight, with a scale, just as I recommend! Several commenters have said that has worked well for them too.
Update 5/2019: I do not recommend Namaste Flour blend for these. I do not recommend Pillsbury for these. Flour Farm worked pretty good for these I’d give it a B+. My friend gfJules flour does not work well in my recipe as written. I made this with Authentic Foods Multi-Blend Flour and it worked very well! This would be one I would recommend for sure!
If you’re using your own flour blend, if it doesn’t have xanthan or guar gum in it, use the 1 1/2 tsp. xanthan that I call for. If your blend already has xanthan or guar gum in it, use just 1/2 tsp. additional xanthan gum. These rolls just need more xanthan than what the default amount is in most flour blends.
If you would like to use a different flour blend, please read through the reader comments below to see what flour blends have worked well for other readers! Make sure you measure the flour by weight!
Common mistakes that would cause your rolls not to turn out well:
Cutting out all of the sugar. I know some of you are avoiding sugar. I would not recommend cutting the sugar in these, but if you really think you need to, don’t cut down to less than 2 teaspoons. It is needed for helping activate the yeast.
Not checking the temperature of your hot water before adding. Use a thermometer like this one that I have to be sure it is 105-110 before adding. Too cold and it won’t activate the yeast, too hot and it can kill the yeast.
Not measuring the flour correctly or used a blend that just doesn’t work well in this. Please try again!
Not mixing for a full 3 minutes – don’t guess; use a timer. Also a medium speed means not slow but not so fast your mixer is shaking and scooting!
Using too much water to shape the rolls. I just wet my finger to smooth the rolls, actually less than in the video (sorry!).
Not letting them rise enough. I depend less on the time and more on the actual look of the rolls. If your rolls haven’t risen fully at 45 minutes make sure you have it in a somewhat warm place but not too hot. I use my oven’s proof setting which puts it at 100 degrees. Before I had an oven with a proof setting, I would turn my oven to the lowest setting, let it warm up, then turn it off and my oven thermometer showed it was 100 degrees, I would put the covered rolls in to rise. Some of you live in more humid climates, and your rolls will likely rise quicker, and even just on the counter.
Not using an oven thermometer to ensure the correct temperature of your oven. Many ovens are off by 25 degrees or so and you need to adjust accordingly. Or like my new oven, it beeps that it’s ready at the correct temperature about 5 minutes before it actually is. My oven thermometer showed me that!
Not testing the finished rolls with a thermometer. Check them at the 24-25 minute mark really quickly and pull out if done. If not done, continue baking and check every 2 minutes until the finished rolls measure 200 degrees in the center.
Okay, enough details, I hope! Are you ready to grab one and dig in yet?
What should you serve these gluten-free rolls with:
We honestly like these with any gluten-free meals, but I definitely like making them when we have soups, stews and casseroles like these:
I hope you and your family enjoy these gf dinner rolls as much as my family does!
If you make these and love them, please come back and give this recipe a 5 star rating in the recipe card! Feel free to comment with tips or to share any successful substitutions you made.
Tell Google you trust My GF Kitchen! Add us to your preferred sources!
Gluten-free Dinner Rolls that taste like grandma’s holiday rolls! We enjoy these gluten-free rolls at the holidays and year-round!
Prep Time1 hour20 minutes
Cook Time25 minutes
Total Time1 hour45 minutes
Ingredients
2¾ cups (11½ oz.) very good quality gluten-free flour blend
1 1/2 tsp. xanthan gum
2 tsp. SAF instant yeast
1/4 cup sugar
1 tsp. salt
1 cup warm water (105-110°)
2 Tbsp. butter, dairy-free margarine, or Spectrum shortening
1 egg (preferably room temp)
1 tsp. cider vinegar
Instructions
In the mixing bowl of your electric mixer, mix together flour, xanthan gum, instant yeast, sugar, and salt.
With mixer running on low speed, add in the hot water (be sure to test temperature with thermometer, melted butter (or substitute), egg, and cider vinegar.
Mix on medium speed 3 minutes.
Spray 8" or 9" round cake pan or pie plate with cooking spray. Using a 2" scoop or 1/3 cup measuring cup, scoop dough into 9 mounds in the pan. I place one mound in middle, then scoop 8 mounds of dough side by side all the way around the pan.
Dip your fingertips into warm water and use to smooth out the tops of the rolls, continuing to wet fingers as needed.
Cover with a dry towel and let rise in a warm place 45 minutes to 1 hour.
During the last few minutes that the rolls are rising, preheat the empty oven to 400°. (if you were rising your rolls in the oven, remove and place on counter during oven preheat).
Bake in 400° oven for 25-28 minutes. Tops should be golden brown and if you measure temperature of dough, it should measure 200°.
Brush rolls with additional 1/2-1 Tablespoon of melted butter.
Notes
Please see blog post for information on egg-free and dairy-free substitutions. If you would like to use a different flour blend, please read through the reader comments below to see what flour blends have worked well for other readers! Make sure you measure the flour by weight!
I've tested many flour blends and the two that work best for this are Gluten-free Mama's flour blend - used in the recipe above as written, or Authentic Foods Multi-Blend Flour works very well in this as well. It has xanthan gum already in it, but I recommend adding an additional 1/2 tsp. xanthan to it. This is what I used recently and it worked very well!
If you're using your own flour blend, if it doesn't have xanthan or guar gum in it, use the 1 1/2 tsp. xanthan that I call for. If your blend already has xanthan or guar gum in it, use just 1/2 tsp. additional xanthan gum. These rolls just need more than what the default amount is in most flour blends.
Pin these gluten-free buns to your gluten-free bread Pinterest board:
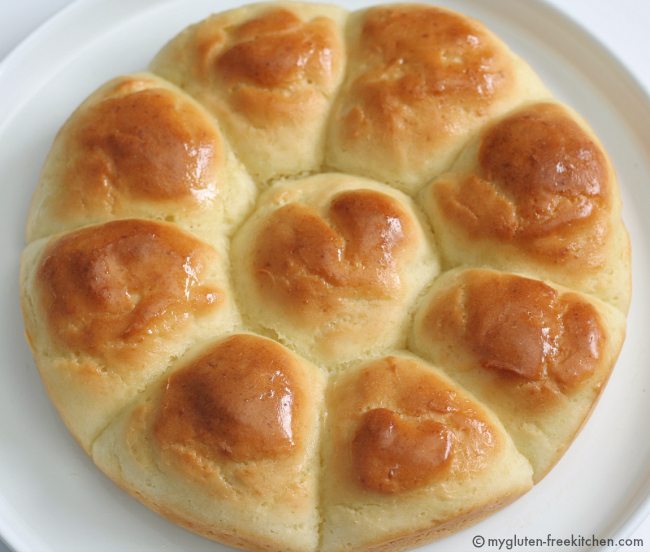
Old photo:
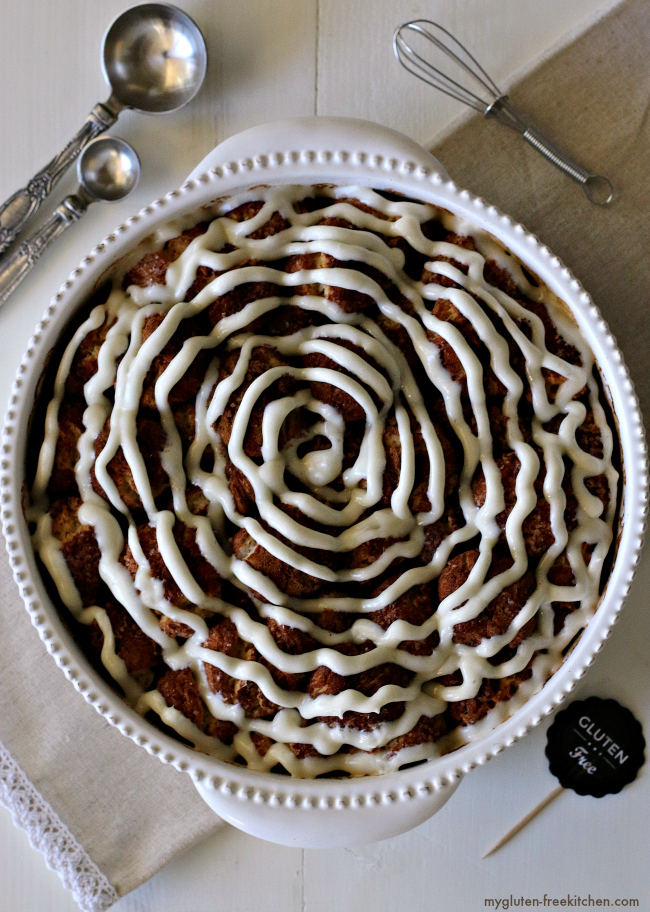
If you love these dinner rolls, make sure to try my new recipe for gluten-free garlic Parmesan rolls. They’re so good with Italian style meals. Take a look:
Just pulled them out of the oven. I used a coconut oil based spread and a plain gluten free flour mix. Also halved the sugar and drizzled olive oil on top just before baking then sprinkled with dried parsley, rosemary, oregano and Himalayan rock salt. They taste great, especially with pumpkin hummus. Thanks for sharing.
These look AMAZING!! My two daughters are celiac, it’s been a journey. We are also dairy, egg, and soy free. I’d love to make these but we don’t have a stand mixer, could I mix these by hand with similar results? I have all the ingredients in hand. I may just try and report back 🙂 thank you for sharing this recipe 🙂
I live in the UK and we don’t have the same flour as you suggest,. I use Glutafin bread mix, can I make the buns with that please advise. Thank you , Joyce
Very good! Just beginning my adventure into GF baking. After failures with GF cornbread, I was a little hesitant, but tried these. Used GMO-Free All Natural Cup-4-Cup flour (that includes Xanthan gum) and Fleiscmann’s Rapid Rise Instant Yeast. Weighed flour as suggested vs measuring. They were a little darker @ 26 min than expected, but cooked through. Nice to have rolls with GF stew again. Saving this recipe & will use again.
THESE. ARE. AMAZING!!!! I have been searching for a gluten free, dairy free roll for such a long time. After making and throwing away recipe after recipe of gross breads and rolls, this was the first recipe that has actually worked!! So exciting. 🙂 I used Bobs Red Mill Flour Blend and it worked perfectly for me. I used Earth Balance Butter to make it dairy free as well. And since I can’t have sugar, I used coconut sugar, which was awesommme! Definitely keeping this recipe and looking forward to making it again. 🙂
So delicious! I made them for Christmas dinner last night and they melted in my mouth! I used Pamela’s Gluten Free Baking Mix and also subbed 1T flax and 2.5 T water for the egg. I did have to cover them with foil the last 10 minutes to avoid further browning, but they were seriously better than any roll (gluten free or not) I’ve had. Thank you!
I don’t think I have ever reviewed a recipe before even though I make so many that I find online. These rolls, though, are AMAZING! I have been gluten free for 4 years and in that time I have attempted many recipes, but this is the first one that fully takes me back to my pre-gluten-free days. Even my husband, who is not gotten free said that he never would have known they were gluten free just by tasting them.
After reading most of the reviews, I made a couple of small modifications based on the ingredients I had on hand.
Flours I used: 1.5 cups Namaste perfect flour blend, .5 cups super fine blanched almond flour, and about .75 cups Trader Joes gluten free flour. I say about because I weighed the flours and added the Trader Joes flour until I hit 11.5 ounces.
I only had regular yeast, so I let them rise for 2 hours.
The only thing I might do differently next time is bake them at a slightly lower temperature. The tops and bottoms got pretty brown, not burned, but dark. I will be saving this recipe and making them over and over again. Thank you so much!
I love how easy this recipe is! I’m not the most advanced in the way of awesome kitchen tools, so o was very happy to learn that I could use my regular hand mixer in place of the stand mixer (which is on my Xmas list!!) I used pillsbury all purpose flour blend, believe it or not and they turned out perfect! I did add the extra 1/4 tsp extra xanthan gum, and it was a super success! Thank you for this recipe!
Hi, just wanted to say I love these, made them twice. Both times I used Cup4cup gf flour. The first time I didn’t add anyxanthan gum because Cup4cup has it added. I found they did not rise as much as I expected. Also, at 400 they burned slightly on bottom. Second time I made these, I did all 1/2 tsp xanthin gum to the flour, and I reduced oven temp to 375. Perfect, we were blown away. Thank you for sharing!
I tired this recipe using the Wendy Wark gluten free flour mix recipe available online. I did add 2 Tbsp of almond flour and xanthan gum as my WW flour mix did not have gum in it. I baked them in a muffin tin at 375 and only for 20 minutes. They turned out great! They were light, fluffy, and Not gummy inside. I did measure by weight and then by cups and it was only 2 1/2 cups so its important to weigh flours. I will be making these for thanksgiving this year. Thanks for the great recipe.
Thanks for the recipe. I used Namaste Perfect Flour Blend, a round metal cake pan, and regular yeast. No added xantham gum since Namaste flour includes it already. They turned out really well–just passing on my substitutes for your readers. I thought about using a cast iron skillet in the oven, but for this first try, I decided against it…..might try that later. Thank you!
I subbed my GF flour mix and they didn’t rise at all. I even checked the temp of my water. I’m not sure what went wrong but we ate them anyway. They were just heavy. Disappointing, will try another recipe.
I have made these buns a number of time. I have always used Bob’s Red Mill Almond Meal Flour. They have always turned out perfect…..until today. The difference is to day I used a pyrex 8×8 square cake pan. I was looking for more uniform square dinner rolls. Note to self: use a metal pan. The pyrex pan baked the rolls at a higher heat of course and the bottoms scorched. I enjoy the flavour but not everyone else does. These pull apart rolls are lovely.
I tried the recipe using Pamela’s baking and pancake mix first. With this gf flour blend the rolls turned out very dense. The next gf flour I tried was Bob’s Red Mill 1 to 1 baking flour. I used only 1 tsp xanthan gum since this flour already contains it. I also used Fleischmann’s rapid rise instant yeast and they turned out perfect. They had the perfect texture and they rose as they should have following the original directions. I baked exactly 23 minutes and they came out perfect.
I know this recipe has been out there a while, but I never review it. It’s excellent! I use the America’s Test Kitchen flour blend and they are great! I have also subbed pineapple juice for the water and they taste like Hawaiian bread rolls. Thank you for the recipe!

 and you might even find it at your local store. I love using this product to cut the rising time down in some of my yeast bread recipes. When using instant yeast, you do not proof the yeast in water. You add the instant yeast with your dry ingredients, and the water with the liquid ingredients. My directions in the recipe card below reflect this change.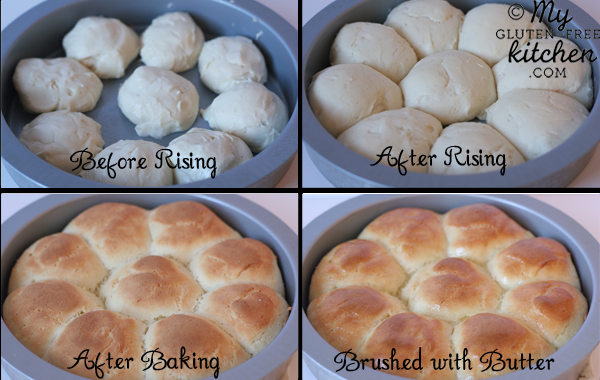


 and boy oh boy did that dough rise! Super big, then collapsed after baking! But they tasted great and had great texture, so I would recommend that one too.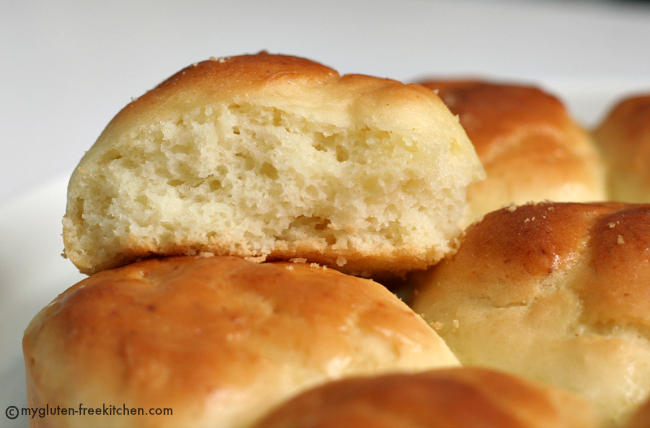

Can you make the rolls the night before and bake them in the morning?
Just pulled them out of the oven. I used a coconut oil based spread and a plain gluten free flour mix. Also halved the sugar and drizzled olive oil on top just before baking then sprinkled with dried parsley, rosemary, oregano and Himalayan rock salt. They taste great, especially with pumpkin hummus. Thanks for sharing.
These look AMAZING!! My two daughters are celiac, it’s been a journey. We are also dairy, egg, and soy free. I’d love to make these but we don’t have a stand mixer, could I mix these by hand with similar results? I have all the ingredients in hand. I may just try and report back 🙂 thank you for sharing this recipe 🙂
I live in the UK and we don’t have the same flour as you suggest,. I use Glutafin bread mix, can I make the buns with that please advise. Thank you , Joyce
Very good! Just beginning my adventure into GF baking. After failures with GF cornbread, I was a little hesitant, but tried these. Used GMO-Free All Natural Cup-4-Cup flour (that includes Xanthan gum) and Fleiscmann’s Rapid Rise Instant Yeast. Weighed flour as suggested vs measuring. They were a little darker @ 26 min than expected, but cooked through. Nice to have rolls with GF stew again. Saving this recipe & will use again.
THESE. ARE. AMAZING!!!! I have been searching for a gluten free, dairy free roll for such a long time. After making and throwing away recipe after recipe of gross breads and rolls, this was the first recipe that has actually worked!! So exciting. 🙂 I used Bobs Red Mill Flour Blend and it worked perfectly for me. I used Earth Balance Butter to make it dairy free as well. And since I can’t have sugar, I used coconut sugar, which was awesommme! Definitely keeping this recipe and looking forward to making it again. 🙂
I am a gluten free backer and mine did not turn out this way tonight. Will try again before giving a bad review.
So delicious! I made them for Christmas dinner last night and they melted in my mouth! I used Pamela’s Gluten Free Baking Mix and also subbed 1T flax and 2.5 T water for the egg. I did have to cover them with foil the last 10 minutes to avoid further browning, but they were seriously better than any roll (gluten free or not) I’ve had. Thank you!
I used Bob’s Red mill 1 to 1 flour and it was good. I suggest adding 1/4 cup hot water extra.
Can this recipe be doubled?
I don’t think I have ever reviewed a recipe before even though I make so many that I find online. These rolls, though, are AMAZING! I have been gluten free for 4 years and in that time I have attempted many recipes, but this is the first one that fully takes me back to my pre-gluten-free days. Even my husband, who is not gotten free said that he never would have known they were gluten free just by tasting them.
After reading most of the reviews, I made a couple of small modifications based on the ingredients I had on hand.
Flours I used: 1.5 cups Namaste perfect flour blend, .5 cups super fine blanched almond flour, and about .75 cups Trader Joes gluten free flour. I say about because I weighed the flours and added the Trader Joes flour until I hit 11.5 ounces.
I only had regular yeast, so I let them rise for 2 hours.
The only thing I might do differently next time is bake them at a slightly lower temperature. The tops and bottoms got pretty brown, not burned, but dark. I will be saving this recipe and making them over and over again. Thank you so much!
Has anyone tried substituting xantham gum with Flax seed? Equal measurement but soak in water for about 5 minutes.
I love how easy this recipe is! I’m not the most advanced in the way of awesome kitchen tools, so o was very happy to learn that I could use my regular hand mixer in place of the stand mixer (which is on my Xmas list!!) I used pillsbury all purpose flour blend, believe it or not and they turned out perfect! I did add the extra 1/4 tsp extra xanthan gum, and it was a super success! Thank you for this recipe!
Hi, just wanted to say I love these, made them twice. Both times I used Cup4cup gf flour. The first time I didn’t add anyxanthan gum because Cup4cup has it added. I found they did not rise as much as I expected. Also, at 400 they burned slightly on bottom. Second time I made these, I did all 1/2 tsp xanthin gum to the flour, and I reduced oven temp to 375. Perfect, we were blown away. Thank you for sharing!
I tired this recipe using the Wendy Wark gluten free flour mix recipe available online. I did add 2 Tbsp of almond flour and xanthan gum as my WW flour mix did not have gum in it. I baked them in a muffin tin at 375 and only for 20 minutes. They turned out great! They were light, fluffy, and Not gummy inside. I did measure by weight and then by cups and it was only 2 1/2 cups so its important to weigh flours. I will be making these for thanksgiving this year. Thanks for the great recipe.
Thanks for the recipe. I used Namaste Perfect Flour Blend, a round metal cake pan, and regular yeast. No added xantham gum since Namaste flour includes it already. They turned out really well–just passing on my substitutes for your readers. I thought about using a cast iron skillet in the oven, but for this first try, I decided against it…..might try that later. Thank you!
I subbed my GF flour mix and they didn’t rise at all. I even checked the temp of my water. I’m not sure what went wrong but we ate them anyway. They were just heavy. Disappointing, will try another recipe.
I have made these buns a number of time. I have always used Bob’s Red Mill Almond Meal Flour. They have always turned out perfect…..until today. The difference is to day I used a pyrex 8×8 square cake pan. I was looking for more uniform square dinner rolls. Note to self: use a metal pan. The pyrex pan baked the rolls at a higher heat of course and the bottoms scorched. I enjoy the flavour but not everyone else does. These pull apart rolls are lovely.
I tried the recipe using Pamela’s baking and pancake mix first. With this gf flour blend the rolls turned out very dense. The next gf flour I tried was Bob’s Red Mill 1 to 1 baking flour. I used only 1 tsp xanthan gum since this flour already contains it. I also used Fleischmann’s rapid rise instant yeast and they turned out perfect. They had the perfect texture and they rose as they should have following the original directions. I baked exactly 23 minutes and they came out perfect.
I know this recipe has been out there a while, but I never review it. It’s excellent! I use the America’s Test Kitchen flour blend and they are great! I have also subbed pineapple juice for the water and they taste like Hawaiian bread rolls. Thank you for the recipe!